VPS&nginxでwordpressを動かすシリーズの一覧になります。このエントリは手順⑥になります。
- WordPressのブログをVPS&nginxへ移行の手順①:Macのターミナルの使い方を学ぶ
- WordPressのブログをVPS&nginxへ移行の手順②:VPS契約から初期設定、コントロールパネルの各種機能
- WordPressのブログをVPS&nginxへ移行の手順③:VPS初期設定編。作業用アカウント作成手順
- WordPressのブログをVPS&nginxへ移行の手順④:鍵認証導入とポートの変更
- WordPressのブログをVPS&nginxへ移行の手順⑤:ファイアーウォールとdenyhostsの設定
- WordPressのブログをVPS&nginxへ移行の手順⑥:nginxのインストール&設定(複数ドメイン対応)
- WordPressのブログをVPS&nginxへ移行の手順⑦:PHPのインストールとPHP-fpm(fastcgi)の導入
- WordPressのブログをVPS&nginxへ移行の手順⑧:MySQLのインストール・設定
- WordPressのブログをVPS&nginxへ移行の手順⑨:wordpressのインストール
前回ではサーバのセキュリティ周りについて書きました。今回はいよいよnginxのインストールをしてみます。
ここが今回のこのシリーズの一番の肝です、はい。
僕の場合、ブログが3つありまして、マルチドメインなんですけど、それぞれにwordpressをインストールする仕様にしています。データベースも全部別。1つのブログで異常発生したときに残り2つに影響出るのがイヤだったのでそうしてます。面倒ですが、そっちのが安全に運営できると思ったので(正解かどうかわからんけど。。。)。
僕はマルチドメインですが、ここでの説明はnginxを複数ドメインで運用する方法にも転用できると思います。いわゆるバーチャルホストの設定をしています。
リポジトリの追加
まずはレポジトリの追加。以下のコマンドを入力。
[sourcecode language=”plain”]yum -y install yum-plugin-priorities[/sourcecode]

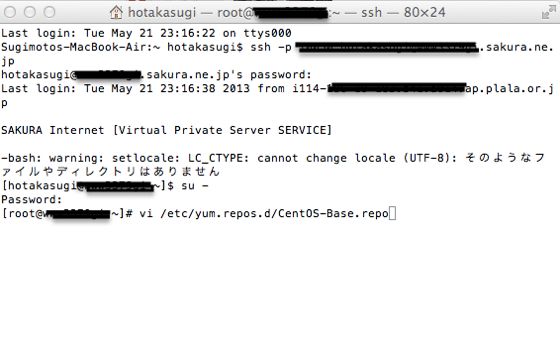
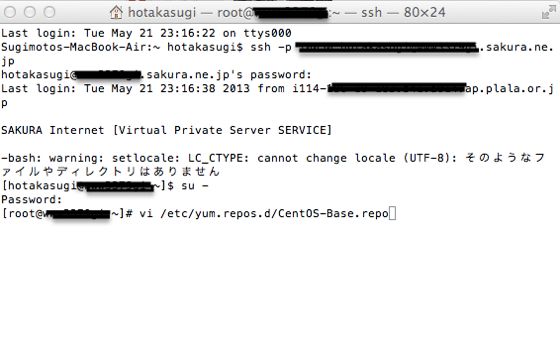
次に以下のコマンドを入力しファイルを開きます。
[sourcecode language=”plain”]vi /etc/yum.repos.d/CentOS-Base.repo[/sourcecode]
以下の記述の次の行にpriority=1 を追加します。
[base]
[updates]
[extras]
[centosplus]
[contrib]
そして:wqで保存。
次はremiレポジトリの追加。
[sourcecode language=”plain”]rpm -Uvh http://rpms.famillecollet.com/enterprise/remi-release-6.rpm[/sourcecode]
最新版をインストールした方がいいと思うので、最新かどうかは以下のURLで確認してください。
http://rpms.famillecollet.com/enterprise/
[sourcecode language=”plain”]vi /etc/yum.repos.d/remi.repo[/sourcecode] ファイルを開き、[remi]の次の行に、priority=1を追加。で、:wqで保存。
まだまだ続きます。今度はrmpforgeリポジトリの追加。
[sourcecode language=”plain”]rpm -Uvh http://pkgs.repoforge.org/rpmforge-release/rpmforge-release-0.5.3-1.el6.rf.x86_64.rpm[/sourcecode]
最新版をインストールした方がいいと思うので、最新かどうかは、以下のURLで確認してください。
http://pkgs.repoforge.org/rpmforge-release/
以上でリポジトリの追加は完了。
nginxのインストール
いよいよnginxのインストール作業です。レポジトリのソースから実行します。nginxのインストール方法は何通りかあるみたいですが、他の方法については こちらを参照してください。
以下のコマンドを入力してインストールを実行。
[sourcecode language=”plain”]rpm -ivh http://dl.fedoraproject.org/pub/epel/6/SRPMS/nginx-1.0.15-5.el6.src.rpm[/sourcecode]
以下のディレクトリに移動して、
[sourcecode language=”plain”]cd ~/rpmbuild/SOURCES/[/sourcecode]
そして以下のコマンドでダウンロード。
[sourcecode language=”plain”]wget http://nginx.org/download/nginx-1.5.0.tar.gz[/sourcecode]
これも最新版を入れた方がいいので、最新版を以下のリンクで確認してください。
http://nginx.org/en/download.html
次にキャッシュパージのためのファイルをダウンロード。
[sourcecode language=”plain”]wget http://labs.frickle.com/files/ngx_cache_purge-2.1.tar.gz[/sourcecode]
でダウンロード。
これも以下のURLから最新版の確認をしてください。
http://labs.frickle.com/files/
ここからファイルの編集が必要になってきます。まずは以下のコマンドでSPECファイルのあるディレクトリに移動。
[sourcecode language=”plain”]cd ~/rpmbuild/SPECS/[/sourcecode]
[sourcecode language=”plain”]vi nginx.spec[/sourcecode] でファイルを開き、
[sourcecode language=”plain”]%define _unpackaged_files_terminate_build 0
%define ngx_cache_purge_version 2.1[/sourcecode]
と入力。2行名のngx_cache_purge_version 2.1の部分のバージョンは自分だダウンロードしたバージョンに変えてください。
さらにnginxのバージョンもダウンロードしたバージョンに変更します。デフォルトでは以下のようになっているはずです。
[sourcecode language=”plain”]Name: nginx
Version: 1.0.15[/sourcecode]
これを自分のダウンロードしたバージョンに変更します。
そしてさらに編集していきます。
[sourcecode language=”plain”]Source7: nginx.sysconfig[/sourcecode]
の次の行に、
[sourcecode language=”plain”]Source10: ngx_cache_purge-%{ngx_cache_purge_version}.tar.gz[/sourcecode]
次に、
[sourcecode language=”plain”]Patch0: nginx-auto-cc-gcc.patch
%patch0 -p0[/sourcecode]
の先頭に#をつける。さらに、
[sourcecode language=”plain”]%setup -T -D -a 10</strong>[/sourcecode]
をその次の行に加えます。
お次は、
[sourcecode language=”plain”]export LANG=’ja_JP.UTF-8′[/sourcecode]
を、
[sourcecode language=”plain”]export DESTDIR=%{buildroot}[/sourcecode]
の上の行に加えます。
まだあります。
以下のラインを、
[sourcecode language=”plain”]–add-module=%{_builddir}/nginx-%{version}/ngx_cache_purge-%{ngx_cache_purge_version} [/sourcecode]
これの下に加えます。
[sourcecode language=”plain”]–with-cc-opt="%{optflags} $(pcre-config –cflags)" [/sourcecode]
そんでもって、
[sourcecode language=”plain”]make %{?_smp_mflags}[/sourcecode]
の下の行に、
[sourcecode language=”plain”]mv ngx_cache_purge-%{ngx_cache_purge_version}/CHANGES ngx_cache_purge-%{ngx_cache_purge_version}/CHANGES.ngx_cache_purge
mv ngx_cache_purge-%{ngx_cache_purge_version}/README.md ngx_cache_purge-%{ngx_cache_purge_version}/README.ngx_cache_purge[/sourcecode]
を加える。
ここまでできたら:wqで保存。
次にいろいろ必要なパッケージをインストール。
[sourcecode language=”plain”]yum -y install GeoIP-devel gd-devel libxslt-devel openssl-devel pcre-devel zlib-devel perl-ExtUtils-Embed[/sourcecode]
そしてビルド実行。
[sourcecode language=”plain”]rpmbuild -bb nginx.spec[/sourcecode]
ビルドが成功すると書き込み完了と表示されます。
そしていよいよダウンロードしたパッケージをインストール。
[sourcecode language=”plain”]cd ~/rpmbuild/RPMS/x86_64/[/sourcecode] でディレクトリ移動。
[sourcecode language=”plain”]rpm -Uvh nginx-1.0.15-5.el6.x86_64.rpm[/sourcecode] で実行です。
nginxのバージョンは自分でダウンロードしたバージョンに数字を変更してから実行してください。
nginxの設定ファイルの編集
まだまだ続くnginxの設定。長いですね。。。
[sourcecode language=”plain”]vi /etc/nginx/nginx.conf[/sourcecode] で設定ファイルを開いてください。
まず、
[sourcecode language=”plain”]worker_processes 1;[/sourcecode]
の部分を自分の契約したVPSのCPUのコア数に変更します。さくらインターネットの場合は以下のリンクでコア数を確認できます。
VPS(仮想専用サーバ)のさくらインターネット
次に、
[sourcecode language=”plain”]worker_cpu_affinity 001 010 100;[/sourcecode]
もCPUのコア数によって変更します。
以下のエントリが参考になります。
nginx設定の検証(worker_processes、worker_cpu_affinity) | 楽しく情報処理技術者試験
コア数が2の時・・・worker_cpu_affinity 01 10;
コア数が3の時・・・worker_cpu_affinity 001 010 100;
コア数が4の時・・・worker_cpu_affinity 0001 0010 0100 1000
という感じですね。
次に以下の部分に追加をします。
[sourcecode language=”plain”]log_format main ‘$remote_addr – $remote_user [$time_local] "$request" ‘
‘$status $body_bytes_sent "$http_referer" ‘
‘"$http_user_agent" "$http_x_forwarded_for"’;[/sourcecode]
のすぐ下に、
[sourcecode language=”plain”]log_format backend ‘$http_x_forwarded_for – $remote_user [$time_local] "$request" ‘
‘$status $body_bytes_sent "$http_referer" ‘
‘"$http_user_agent"’;[/sourcecode]
を加えます。
そして、
[sourcecode language=”plain”]include /etc/nginx/conf.d/*.conf;[/sourcecode]
の上に以下のnginxのパフォーマンスを引き出すためにgzipの圧縮設定、プロキシキャッシュの設定などをもろもろ加えます。
gzip on;
gzip_http_version 1.0;
gzip_comp_level 1;
gzip_proxied any;
gzip_vary on;
gzip_buffers 4 8k;
gzip_min_length 1000;
gzip_types text/plain
text/xml
text/css
text/javascript
application/xml
application/xhtml+xml
application/rss+xml
application/atom_xml
application/javascript
application/x-javascript
application/x-httpd-php;
gzip_disable “MSIE [1-6].”;
gzip_disable “Mozilla/4”;
proxy_cache_path /var/cache/nginx/proxy_cache levels=1:2 keys_zone=czone:32m max_size=256m inactive=1440m;
proxy_temp_path /var/cache/nginx/proxy_temp;
proxy_cache_key “$scheme://$host$request_uri”;
proxy_set_header Host $host;
proxy_set_header X-Real-IP $remote_addr;
proxy_set_header Remote-Addr $remote_addr;
proxy_set_header X-Forwarded-Host $host;
proxy_set_header X-Forwarded-Server $host;
proxy_set_header X-Forwarded-For $proxy_add_x_forwarded_for;
proxy_set_header Accept-Encoding “”;
proxy_hide_header X-Pingback;
proxy_hide_header Link;
proxy_hide_header ETag;
proxy_connect_timeout 5;
proxy_send_timeout 10;
proxy_read_timeout 120;
proxy_cache_use_stale timeout invalid_header http_500 http_502 http_503 http_504;
proxy_cache_lock on;
proxy_cache_lock_timeout 5s;
client_max_body_size 10m;
client_body_buffer_size 256k;
server_tokens off;
server_name_in_redirect off;
upstream backend {
ip_hash;
server 127.0.0.1:8000;
}
upstream phpfpm {
ip_hash;
server 127.0.0.1:9000;
}[/sourcecode]
さらに共通confファイルを作っていきます。これは以下のリンクのまんまやりました。大変参考になりました。このエントリの共通confの部分そのままです。
nginxの設定ファイルを書きなおした – UKLab
リバースプロキシファイル作成
リバースプロキシのファイルを作成します。複数ドメインの設定もここで行います。
[sourcecode language=”plain”]vi /etc/nginx/conf.d/reverse-proxy.conf[/sourcecode]
以下のテキストを貼りつけます。変更しないといけない部分は、
server_name ドメイン名; と
root /var/www/html/XXXX; の2行だけ。
wordpressをインストールするディレクトリをあらかじめ作成しておく必要があります。
具体的には、
[sourcecode language=”plain”]mkdir root /var/www/html/XXXX[/sourcecode] で作成。XXXXの部分は自分で自由に変更してください。server_name ドメイン名には自分のドメインを入れます。
[sourcecode language=”plain”]server {
listen 80;
server_name ドメイン名;
root /var/www/html/XXXX;
index index.html index.htm;
charset utf-8;
access_log /var/log/nginx/$host.access.log main;
error_log /var/log/nginx/$host.error.log;
include /etc/nginx/conf.d/common/drop.conf;
rewrite /wp-admin$ $scheme://$host$uri/ permanent;
set $mobile ”;
include /etc/nginx/conf.d/common/mobile-cache.conf;
location ~* ^/wp-(content|admin|includes) {
index index.php index.html index.htm;
if ($request_filename ~ .*.php) {
break;
proxy_pass http://backend;
}
include /etc/nginx/conf.d/common/expires.conf;
}
location / {
if ($request_filename ~ .*.php) {
break;
proxy_pass http://backend;
}
include /etc/nginx/conf.d/common/expires.conf;
set $do_not_cache 0;
if ($http_cookie ~* "comment_author_|wordpress_(?!test_cookie)|wp-postpass_" ) {
set $do_not_cache 1;
}
if ($request_method = POST) {
set $do_not_cache 1;
}
proxy_no_cache $do_not_cache;
proxy_cache_bypass $do_not_cache;
proxy_redirect off;
proxy_cache czone;
proxy_cache_key "$scheme://$host$request_uri$mobile";
proxy_cache_valid 200 0m;
proxy_pass http://backend;
}
include /etc/nginx/conf.d/common/phpmyadmin.conf;
include /etc/nginx/conf.d/common/postfixadmin.conf;
error_page 500 502 503 504 /50x.html;
location = /50x.html {
root /usr/share/nginx/html;
}
}[/sourcecode]
ドメイン1つだけの場合は、これでオーケーですが、複数ドメインを設定したい場合は、上と同じものを繰り返してその下に張り付けます。
root /var/www/html/XXXXのディレクトリは別に作成する必要があります。
僕の場合は、hotakasugi-jp.com、another.hotakasugi-jp.com、enter.hotakasugi-jp.comの3つを別々のディレクトリを指定して設定しています。それぞれ
[sourcecode language=”plain”]server_name hotakasugi-jp.com
root /var/www/html/XXXX;
server_name another.hotakasugi-jp.com
root /var/www/html/YYYY;
server_name enter.hotakasugi-jp.com
root /var/www/html/ZZZZ;[/sourcecode]
みたいな感じです。
バックエンドファイルの作成
次にバックエンドファイルの作成です。
ますはファイルを作ります。
[sourcecode language=”plain”]vi /etc/nginx/conf.d/backend.conf[/sourcecode]
そして以下のテキストを貼りつけます。例によって編集箇所は、
server_name ドメイン名;
root /var/www/html/XXXX; となります。リバースプロキシのファイル編集と要領は一緒ですね。
[sourcecode language=”plain”]server {
listen 8000;
server_name ドメイン名;
root /var/www/html/XXXX;
index index.php index.html index.htm;
access_log /var/log/nginx/$host.backend.access.log backend;
keepalive_timeout 25;
port_in_redirect off;
gzip off;
gzip_vary off;
include /etc/nginx/conf.d/common/wp-single.conf;
}[/sourcecode]
これもドメイン1つだけなら、これでオーケーですが複数ドメインを設定する場合はドメインの数だけ繰り返します。
プロキシキャッシュディレクトリの作成
プロキシキャッシュのディレクトリを作ります。
[sourcecode language=”plain”]mkdir /var/cache/nginx/proxy_cache[/sourcecode]
所有者をnginxに変更します。
[sourcecode language=”plain”]chown nginx:root /var/cache/nginx/proxy_cache[/sourcecode]
最後に、nginxをリスタートして設定を反映させます。何かnginxの設定を変更した場合は必ず再起動を行いましょう。でないと変更が反映されないので。
[sourcecode language=”plain”]/etc/init.d/nginx restart[/sourcecode]
あと、以下のコマンドを入力して、サーバ再起動時にもnginxが自動で起動するようにします。
[sourcecode language=”plain”]chkconfig nginx on[/sourcecode]
以上でnginxの設定は完了です。
パフォーマンスgzipやExipiresヘッダーなど、向上のための設定も同時に入っているので長いですが、やっておいて損はしないはず。
Timeoutの設定などもいじった方がいいとは思いますが、それはまたおいおい説明したいと思います。
今日はこの辺で。
エムディエヌコーポレーション
売り上げランキング: 259,153


